Requirements
- MATLAB/Simulink R2024b tested
- Embedded Coder
- PuTTY tools (
plink.exeandpscp.exe) available on the Windows host - Raspberry Pi 64-bit target with SSH access
- Git available on the Windows host, for automatic XCPlite checkout
- INCA or CANape for measurement/calibration import
- Simulink support package for Raspberry Pi
Raspberry setup
- Install a clean Raspberry OS distribution (Trixie tested) on your SD. Note your SSH access credential (IP, username, password)
- Setup the Simulink Raspberry support package (it will install all the libraries needed on your board)
- SSH on your raspberry Pi to setup manually a fixed ethernet IP
display all connections: nmcli connection show
The default name for the wired Ethernet connection is “Wired connection 1” (may differ by locale), and the Wi-Fi connection is usually named after your SSID. You will see something like this:
NAME UUID TYPE DEVICE Wired connection 1 xxxxxxxx-xxxx-... ethernet eth0 MyWiFiSSID yyyyyyyy-yyyy-... wifi wlan0
Set static IP for your connections (you can choose to connect either via eth or wifi from INCA):
sudo nmcli con mod "Wired connection 1" ipv4.addresses 192.168.1.101/24 sudo nmcli con mod "Wired connection 1" ipv4.gateway 192.168.1.1 sudo nmcli con mod "Wired connection 1" ipv4.dns "8.8.8.8,1.1.1.1" sudo nmcli con mod "Wired connection 1" ipv4.method manual sudo nmcli con mod "MyWiFiSSID" ipv4.addresses 192.168.1.100/24 sudo nmcli con mod "MyWiFiSSID" ipv4.gateway 192.168.1.1 sudo nmcli con mod "MyWiFiSSID" ipv4.dns "8.8.8.8,1.1.1.1" sudo nmcli con mod "MyWiFiSSID" ipv4.method manual sudo nmcli con down "MyWiFiSSID" && sudo nmcli con up "MyWiFiSSID"
- Download the last release from the GitHub Repo and unzip it on a folder.
run modelParams.m to import in the workspace the parameters for the example models
run loginData.example.m with populated login data (SSH connection to your board)
N.B. the first ran on a clean linux distro must be done with deploy option active to flash the XCP server manually. After, you can either choose to flash via Matlab or via INCA / CANAPE / XCP clientoutput on matlab command window:
INCA/CANape import: C:\Users\alber\Desktop\xcp_fable\V1\xcp_out\xcpMultiRateTest.a2l + C:\Users\alber\Desktop\xcp_fable\V1\xcp_out\xcpMultiRateTest.hex INCA ProF install: C:\Users\alber\Desktop\xcp_fable\V1\xcp_out\xcpMultiRateTest_XCP_Flash_ProF (one hex for dataset AND flashing) XCP on TCP: 192.168.0.101:5555
Use with INCA
- Import the a2l + hex project in your database
- Create a new workspace, configure a device for XCP on Ethernet: Ethernet-System>XCP
Assign the imported ECU project for the device
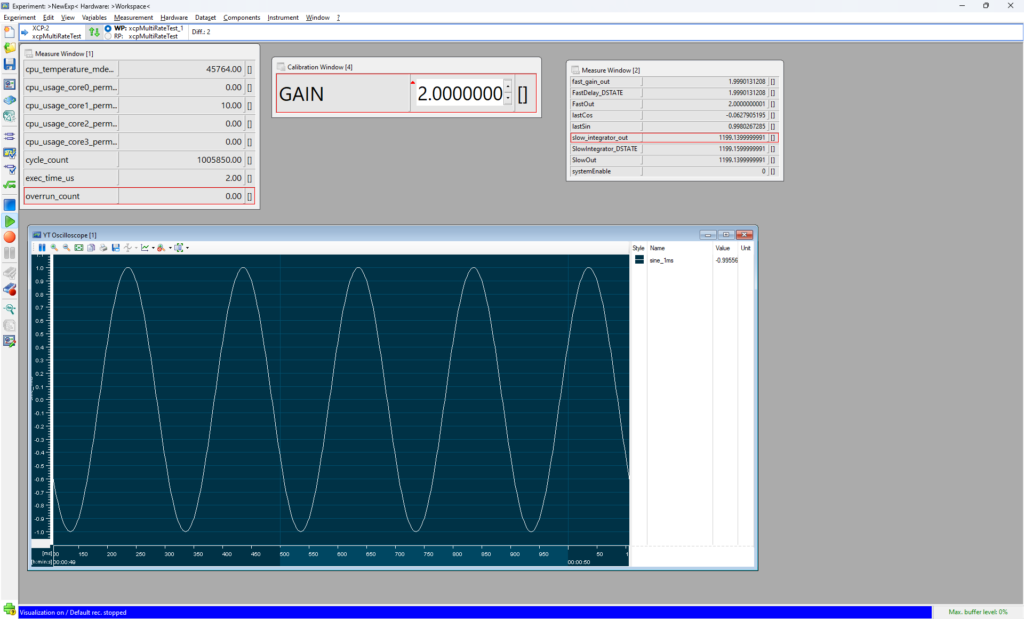
Standard XCP pages manipulations are available: DOWNLOAD, UPLOAD, FLASH (ProF file is generated from Matlab scripts) - Open the experiment and enjoy!
- Default helpful channels:
cpu_temperature [mDegC]
cpu_usage_coreX [%]
cpu_cycle_count [#]
exec_time [uS]
overrun_count [#]